


Sauna Refresh
Notes from our backyard sauna facelift

A few weeks ago Tom came down from Portland to visit. We enjoy a project, so the mission for the week was to redo our backyard sauna’s exterior.1
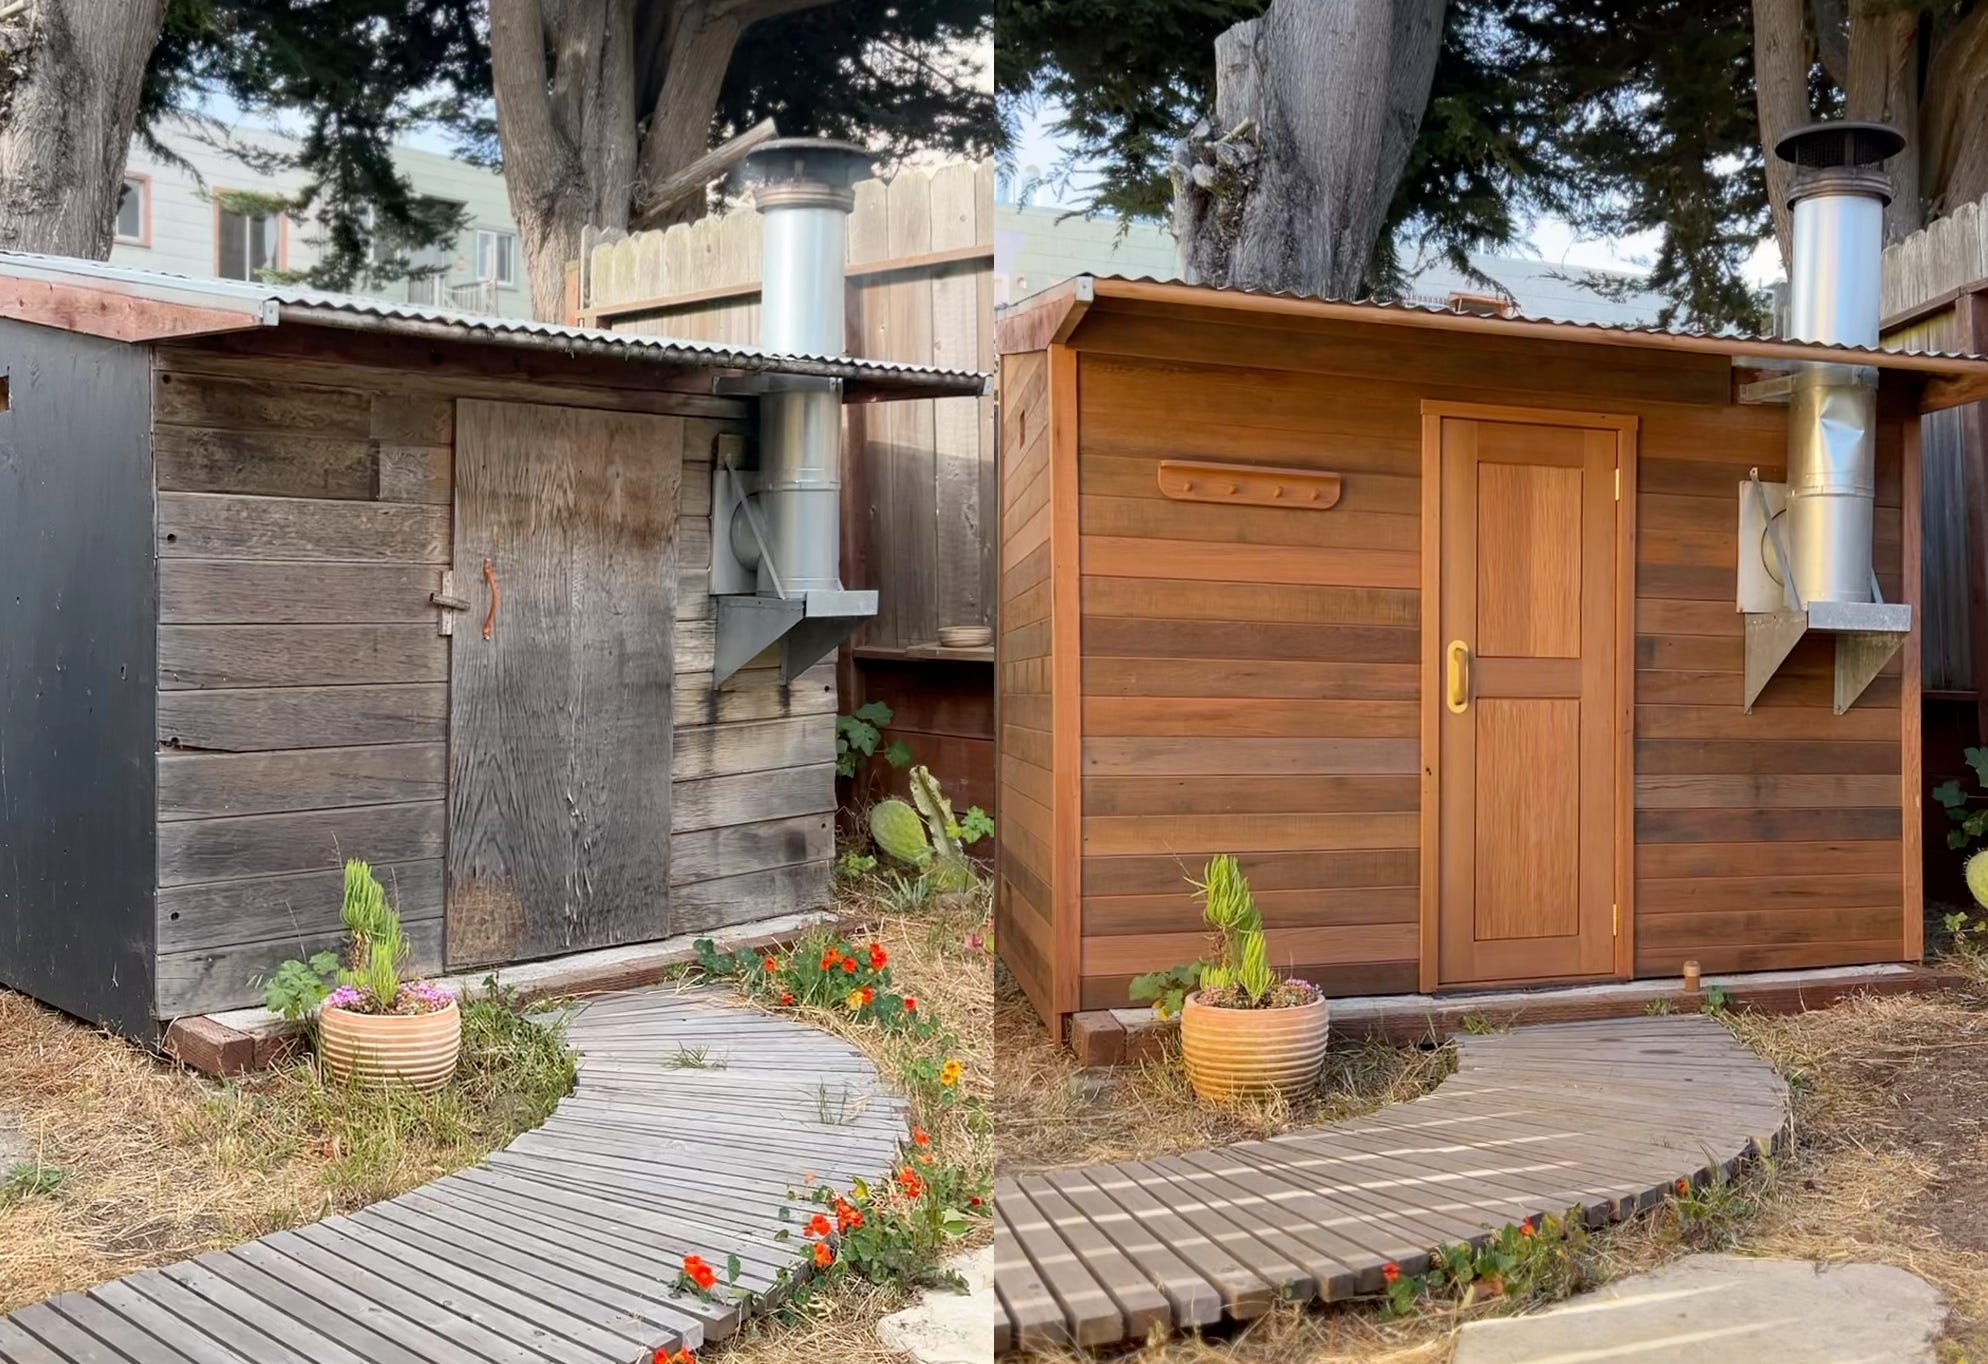
Here’s a short video of the work and some before and after photos:
The backstory on this sauna is that Molly and I moved into this house a few years back, after our friends, Emma and Charlie, had been living in it for about a decade. Charlie built this sauna 10 years ago and it’s been humming along since. We get a lot of mileage from it.
The exterior has gotten rough over the years and was never fully clad in siding, plus the door was holding on for dear life. So the goals for the project were:
Pry off the siding and install some freshy fresh redwood.
Build and install a new door—this one 6 inches taller.
Keep the surgery to a minimum—because once we start peeling back layers there’s bound to be issues that beg for deeper exploration and repair and I had zero interest in effectively rebuilding the entire sauna. It is what it is, and a simple facelift was all we were aiming for. Minimal mission creep.

Step one was removing the old siding. We found that the plywood sheathing underneath looked surprisingly good, except around the stovepipe and the hole in the roof. That section merited replacement, so we picked up a new sheet of 1/2” CDX. We also noticed that the sheathing wasn’t as attached to the framing as it could have been, so we went around the building with the nail gun, tracking down studs and firing nails every 6” on the edges, and every 12” in the field.
In order to install the new door we needed to remove old studs and reframe the doorway. This exposed additional framing and we took the opportunity to bolster it with additional blocking and a heap of framing screws.

A brief aside on this construction and on some general building ethos…
This was Charlie’s reply when I sent him some wall autopsy photos: “Haha, my framing. Just made it up as I went.”
It showed. Charlie seemed to favor a horizontal stud approach, which is… atypical.
But, what also shows is that he built a sauna. One which stood for a decade and remained totally functional until our elective renovation. And while there’s a lot to be said for building something the right way, I think there’s more to be said for building something at all.
The measured risk in a sauna build is, of course, burning it down. And to Charlie’s credit he did his homework and took precautions. The stove was installed correctly and over a concrete hearth, and he hung double layered heat shields on the walls and ceiling. I’d argue this is an example of knowing the rules before you break them… winging the framing on a tiny building because you’re new to this and just want to make a thing, sure why not. But, be smart enough to recognize legitimate fire risk and read about stove clearances and heat shields, which Charlie clearly did.

Anyway, after shoring up the framing and sheathing, and reframing the doorway, we got to installing the door. Like Charlie, I kinda made this up as I went along.
I built a door in my shop from salvaged old growth redwood and scalloped one face of the panels with an angle grinder and a wood carving disc.

The jambs and threshold were made from the same redwood and attached directly to the framing—built in place, rather than the standard method of installing the door frame as a unit. Then we cut the door down to fit within the frame just so. This unconventional method only sorta worked—it was my second attempt at making a door and my first time building an exterior door with weather stripping, so… mistakes were made.

First off, I didn’t leave quite enough room for the weather stripping, which made the door unable to close. The fix we landed on was ditching the weather stripping on the hinge side and the top of the door. Not the end of the world, and a lesson learned in leaving adequate space next time.
Second, I didn’t plan on the front wall not being in plane and so when we adjusted and installed the jambs to precisely fit the wall—so they’d be flush with the interior and exterior cladding—this made it so the door wouldn’t close evenly and was protruding near the top of the frame.
It’s hard to paint a picture of that mistake with words, but basically, if you looked at the bottom of the door when it was first installed—before we added trim—it appeared perfectly shut. And if you then looked up to the top of the door, it appeared as if I didn’t know how to make doors.


The solve here ended up being an application of intentional offset—the shadow gap between the door and frame, plus a piece of offset trim placed extra close to the offending edge—and the mistake was largely obscured. Sprinkle in a little acceptance that this is all a learning opportunity and a backyard sauna that only has so much life ahead of it, and you know what… that door looks just fine.
Once the door was installed, Tom attached the oak and leather handle he’d made in Oregon and the brass escutcheon he’d ordered from SendCutSend.

For siding I’d had some redwood from an old water tank moulded into shiplap by Makena at Knotty Hole Woodworks and we elected to fasten it directly to the plywood sheathing.
On a project of greater consequence there would be a weather resistant barrier over the sheathing, and the siding would likely be installed across furring strips, creating a drainage gap—AKA a “rain screen.” But, as previously mentioned, a major goal with this refresh was limiting the scope and keeping in mind the underlying bones and presumed longevity of the sauna.
It had been getting by just fine without Tyvek or a rain screen, and so it would continue getting by without it—though I did apply some flashing tape around the stovepipe penetration and up to the hole in the roof, where the plywood had previously seen some water damage.

We started on the back wall and hung the shiplap through the tongue with a crown stapler, then came back through and face-nailed it after the whole wall was all up. It’s a whole lot easier to lay crisp nail lines once all the pieces are in place.


Along the way it began to feel like the door and trim were too clean to muddy up with nails, and given that this sauna is tucked into a corner where you only see two sides of it, we made a last minute decision to use GRK trim head screws in place of the siding nails on those two visible walls. A good choice, I think, as the screws virtually disappear into the wood at a distance.


At this point we were down to a few finishing touches. Tom built a little shelf for stashing bottles, towels, and eye glasses, and fashioned a stop to keep the door from swinging too far. And we replaced the wooden dowel that strung across the underside of the roofing.

Last item was the door latch. I’d originally purchased some magnets, but we didn’t trust they’d work… the door demanded something stronger to close firmly against my weather stripping bungle. So, we picked up a ball catch from the hardware store, which provided the exact satisfying action we were looking for—and with an ooooooooh inducing snappy latch of the door, that was a wrap on the project.
OTHER FRESH SAUNA NEWS
Fjord recently opened in Sausalito. One of the founders is a friend of a friend and I’ve got the absolutely teeny tiniest involvement in it, so I’m biased. But having twice visited with friends to soak in the heat, sprawl on the deck, and dip in the bay… boy did we find it to be wonderful. The photos look nice, but the experience absolutely overdelivers. For those in the California Bay Area, check it out.

DIRECT TO YOUR INBOX
NEW TO THE NEWSLETTER? TO BUILDING?
Start with these posts on Project Planning and Construction Basics.
Or these posts on Community Building.
Or browse. Posts wander from friendship, to workshops, to tools, to explosives. Because we contain multitudes.
elevatedspaces.ca | Instagram | YouTube
Of course, it wouldn’t be the 2025 creator economy if I didn’t wring some income from an otherwise wholesome project between two friends, so I put together some plans and an illustrated step-by-step build guide to build a sauna like this. Half the profits go to Charlie and the other half go to paying off my redwood. That only seems fair.
How do you feel about uninvited sauna guests? Another beautiful creation I need to see for myself, the first I have to sweat in for myself.
Looks so great!