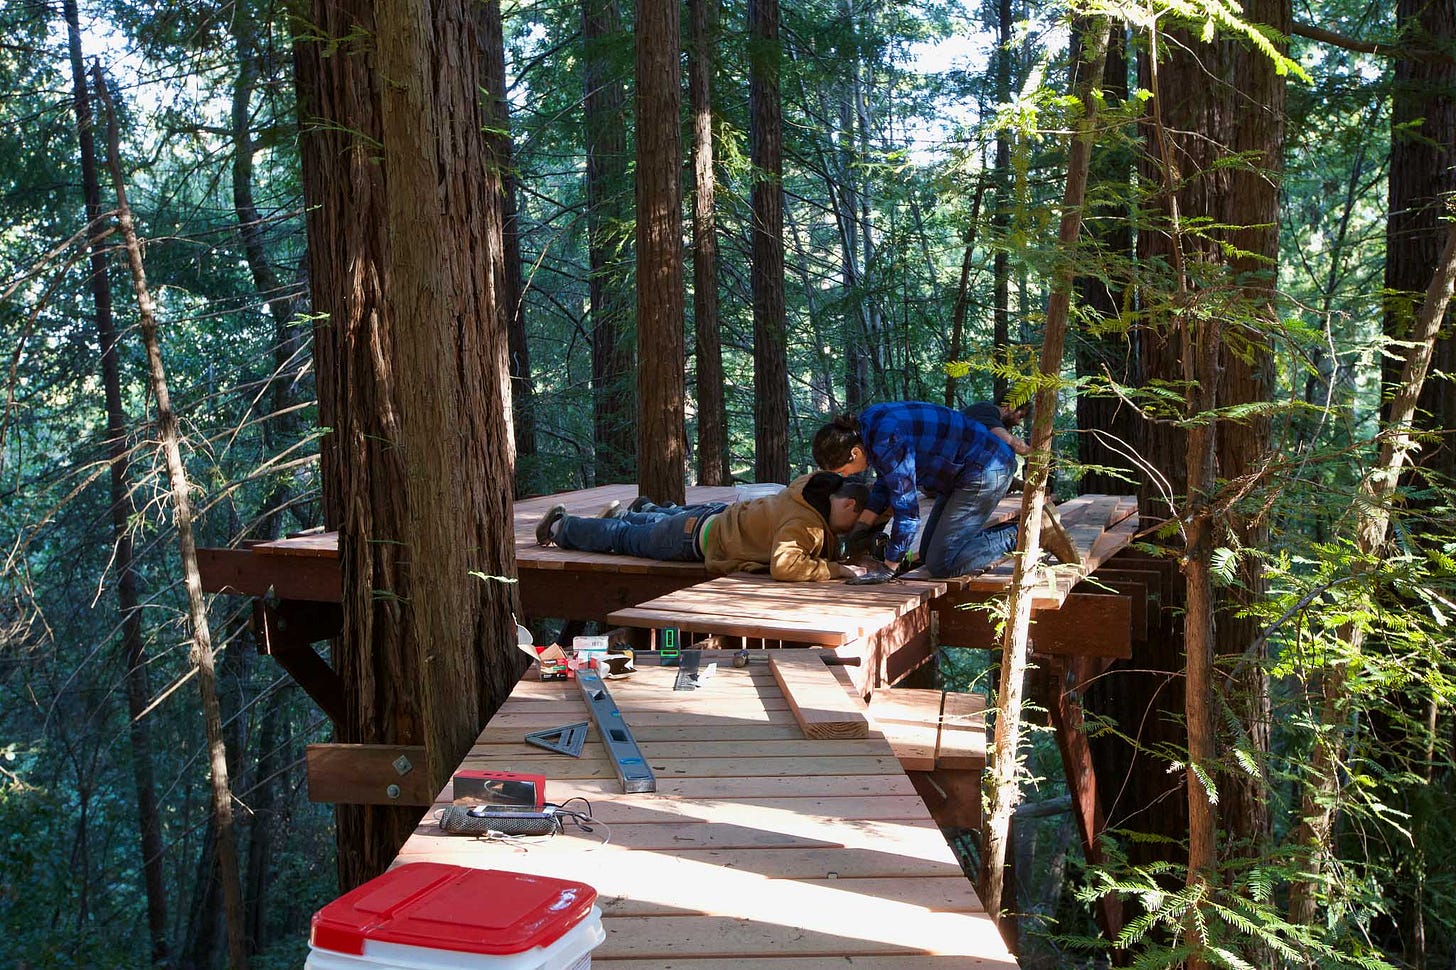
I’ll do a deeper dive on in-tree construction in the future—how to measure and design in the trees, and how to build in them (and why I think you should)—but first I want to talk about my progression of in-tree construction.
Why?
First, I figure the humble and approachable beginnings makes the whole endeavor less daunting. It did for us.
Second, it’s because the evolution highlights a very important drum I beat often:
Just start. Put one foot in front of the other and get moving. Do some due diligence and don’t kill anyone… but learn by doing, make some mistakes, and just start building. Don’t get so bogged down under the weight of doing it “right” that you never get started.
2016, November
When Molly and I first bought our property, building some kind of in-tree Ewok village stuff was a major part of the fantasy for me. Honestly, it was like 70% of it.
So, on our first weekend when we clear an overgrown area for our fire pit, in my excitement to build something—anything—attached to a tree, I make a bench that sits atop three stumps of some small tanoaks we’d just cut down.
The stumps are cut flat(ish) and level to one another using a 2x4 and a 4’ long level. I frame the bench out, notch it into the stumps, and screw it down with some deck screws.
(In writing this post I realized I have way more photos of this than now feels appropriate for this little bench. We were very excited and proud.)
2017, March
Several months later, Darren and I build “The Perch,” a small deck big enough to hold a hammock or two, or a tent. At the time I’m aware of the more professional treehouse building hardware… but the cost, specialized tools, and intimidation level are off-putting, so we opt to go by other means. Baby steps.
I come up with a design that involves lag bolting beams to the trees and sitting a deck frame atop those, leveled with a string level. I research joist and beam span tables to get a sense of how the deck should be built and make a few tweaks, but generally abide by the wisdom of all the engineers before me.
A good time to mention, as I’m sure many of you are wondering… bolts and other more robust treehouse hardware do not harm the tree. And trees grow from their tops, and out from their centers. So, for example, an anchor placed 6’ off the ground will always be 6’ off the ground. And if installed well, the tree will grow around it, strengthening the connection over the years. All this is why there can exist a robust industry of professional tree house builders.
The beams get bolted right into the tree using the longest and biggest galvanized lags the hardware store sells. ½” thick and maybe 10” long. These bolts are rated to support significantly more weight than would ever fit onto the deck, so that’s fine.
The only real issue is that bolting the beams directly to the tree means the tree will start to grow into the deck. It won’t harm the tree, but it’ll scar it a bit and limits the life of the deck. This is the advantage of more professional treehouse hardware— it creates a lot of stand-off space from deck to tree, allowing for decades of unrestricted growth around the bolt.
Anyway, the thinking as we embark on this less-than-ideal build is that it’s easy/small/cheap enough that we can just see how the trees are growing around it and, if need be, remove it or adjust it down the line.
The perch proves to be a helpful learning experience, both in construction and in seeing the value of a small alcove where a person or two can have their own space.
2017, May
Two months later, my friend Drew announces he’s coming into town for a weekend hang and we’re VERY excited to work on a project together. So I hurriedly pull the trigger on a larger tree deck build Molly and I had been pondering.
It will have a long walkway extending off a hillside out into a redwood grove, ending up about 15 feet off the ground at the highest corner (though perched on a hillside it feels much higher). With a built-in bench, enough room for a lot of people, and a more thrilling height, it’s definitely a bigger project.
Because the project came up quickly and I’m still intimidated by the unknown, we still don’t make the leap to pro-grade hardware. However, there are a couple of smaller evolutions.
First, a laser level. Couldn’t be any happier about that. Projecting a level line across a grove of trees makes for MUCH easier construction. Second, the design uses big diagonal knee braces extending down from the main support beams. Third, to give the trees more room to grow, I make some redwood spacers to go between the beams and the trees. And to accommodate those spacers, I order larger bolts than are available from the local hardware store. Big ¾” and 1” ones.
While there's obviously improved ways to build a tree deck like this, it serves as an important stepping stone in building up the confidence (and competence) to graduate to more involved levels of construction.
It gets us comfortable using a bigger drill in the trees (Milwaukee Hole-Hawg), bigger auger bits and hardware, building from ropes and scaffolding, mapping larger tree groves, etc.
The deck construction itself is informed by joist and beam span tables, and the bolts are rated well above what’s necessary. While the tree connections aren’t as professional as they could be, it’s also not going to collapse. (The bench design is, admittedly, a little sketchy. And of course there’s a lack of a railing… though we added one down the road.)
2017, July
Our shower. And oh, what a shower.
Having acquired more suitable tools and some necessary experience, I want to do a more professional job.
We purchase a tri-beam kit from treehousesupplies.com. Our light duty version of the kit (think kid’s playhouse or, say, outdoor shower) uses XXL lag bolts to give some stand-off room from the tree for growth and a rock solid surface to put a platform across. Heavier duty versions use Garnier Limbs/Treehouse Attachment Bolts (more on them in a bit).
A fairly by-the-book deck and walkway is built on the tri-beam assembly and the rest of the shower atop that.
Like the tree deck, we added a railing down the road. Sadly the railings came in just before the 2020 wildfire did, so we hardly got to enjoy them.
2018, February
A year after building the tree deck, we decide to add a lower level. This will have its own entrance, but also be connected by a steep staircase to the upper deck, and will hold a wood fired hot tub. And, finally, it’ll use big boy hardware— Garnier Limbs.
Micheal Garnier is one of the pillars of treehouse design, and he invented the Garnier Limb (via his own similar evolution that I just chronicled above). It’s a girthy bolt with an enlarged “boss” that is sunk into the tree, requiring a specialized 3-in-1 drill bit, or a combination of forstner and auger bits.
The Garnier Limb (GL), sold by Micheal (and via other manufacturers as a Treehouse Attachment Bolt, or TAB), is the gold standard in treehouse construction.
On the hot tub deck we install a handful of GLs to support some large beams, big spans, and a heavy hot tub.
The the reassurance of beefy pro-grade hardware is notable, and now having gotten comfortable with the hardware, I come up with a plan to adjust the beams of the first tree deck build and retrofit them with proper GLs.
I never get around to it though, what with the wildfire and all.
Post wildfire, however, we did put that Hole-Hawg and GL experience to use and hung the backside of our little A-frame build in the trees.
2020, July
I’ve worked on a few tree builds since. The most “professional” of which was an elevated walkway in an old growth redwood grove in Eureka, CA.
Jess is the guy running the build and he invites me on. (We'd met at a workshop the previous year.)
For this build we install 300 Garnier Limbs to support nine platforms and suspension bridges. The highest point on the walkway is just over 100 feet off the ground, with catenary cables nearly 100 feet above that, so me and a half dozen other folks are spending most of the day working from harnesses and ropes, sometimes 200 feet up, zipping across access cables, all while trying very hard to not drop anything.
Fun project. The stuff of Ewok Village dreams.
Something I carry with me about this project was that it—like all tree builds—was inherently unique, so even for this company which has done a ton of similar work, there were novel designs and techniques being tried for the first time.
For instance, the platform frames were an all-new scalable concept that worked sort of like a camera’s diaphragm shutter in how it adjusted to fit trees of different diameters.
Also, we had to invent a jig and method to precisely mark the location and orientation of 8 GLs around a variety of tree trunks that might be 8 feet across, and the project simply involved loads of other cobbled together assemblies, custom brackets, and one-off rigging techniques.
Point being, even at that multi-million dollar level of undertaking there often wasn’t an explicit method of the “right way” to do a thing.
I end on that note to say that it’s all a work in progress.
Of course, there are certainly methods of building that are more correct than others—I mean, do a modicum of research and don’t maim anyone because you erroneously believed there’s “no wrong answers in construction”—but, you know, take some solace that the “right way” is constantly evolving, even at the top rung of the ladder.
That perspective—and the value I put on learning-by-doing—has been instrumental in keeping me from getting so hung up on doing it “right” that I never do anything at all. We all start somewhere and I don’t imagine I would have built anything in the trees otherwise.
I’ll do a post detailing the nuts and bolts, and dos and don’ts, of tree construction another time.
-Jeff